

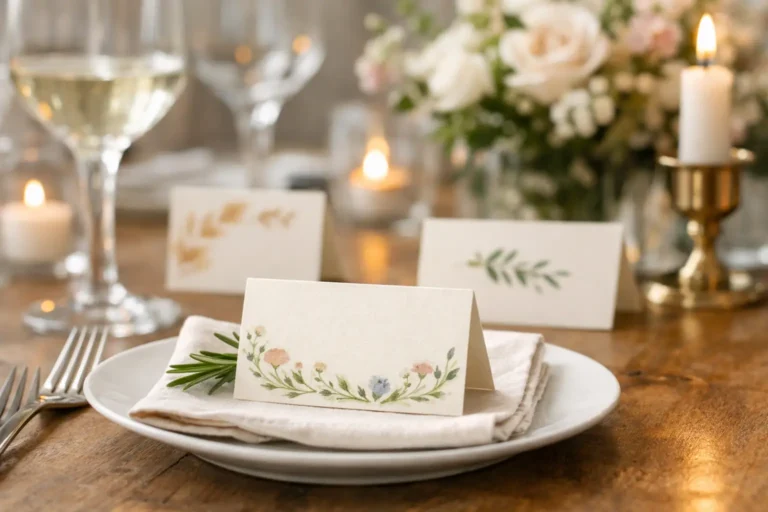
A placecard does more than point someone toward a chair. It gives every guest a tiny, personal hello before the first toast, slice of cake, or serious debate about who gets the last dinner roll. Learning how to create party placecards is one of the easiest ways to make a birthday table, bridal shower, holiday dinner, or classroom celebration feel thoughtfully put together without turning party prep into a full-time craft project.
The best part? Placecards do not need fancy calligraphy or complicated supplies. A cheerful color palette, readable names, and one small detail that fits the occasion can make a big impression.
Start With the Party Table, Not the Paper
Before choosing cards, think about what guests will see around them. A formal dinner may call for crisp white folded cards with a gold or black pen. A kid’s birthday party can handle bright colors, silly doodles, or cards shaped like stars, animals, cupcakes, or game controllers. For a garden brunch, soft florals and leafy details feel right at home.
This first decision keeps everything looking intentional. Your placecards do not have to match every napkin, plate, and balloon exactly. They just need to belong at the same party. Pick one or two colors from your table setting, invitation, or cake decorations, then repeat them on the cards.
If your gathering is casual, feel free to be playful. A cheerful name card with a tiny smiley face can work better than something overly formal. If the event has a dressy feel, let the design stay simple and let the paper and lettering do the work.
What You Need to Create Party Placecards
You can make a lovely set with supplies you may already have. Choose paper that is sturdy enough to stand or stay flat without curling, especially if there will be food, drinks, and enthusiastic guests nearby.
For most party placecards, gather:
- Blank folded cards or cardstock cut into small rectangles
- A black pen, colored markers, or paint pens
- Scissors or a paper trimmer
- Optional stickers, washi tape, stamps, ribbon, or small embellishments
- A guest list, checked twice for spelling
Cardstock is usually the easiest choice because it looks polished and holds its shape. For a relaxed buffet, flat tags placed on napkins or tied around cutlery can be just as charming. For a sit-down meal, folded tent cards are more practical because guests can spot their names from a few feet away.
How to Create Party Placecards in Five Simple Steps
1. Choose a size that works at the table
A finished folded card around 3.5 by 2 inches is large enough for a name and small enough not to compete with the centerpiece. If you are using bold lettering, longer names, or a decorative illustration, go slightly wider.
Avoid making cards too tall. They can block conversation across the table, especially when paired with flowers, candles, or serving dishes. Low and wide usually wins.
2. Write or print every name clearly
This is the one detail that cannot be sacrificed for style. Use a dark ink against a light background, leave room around each name, and write large enough for guests to read without picking up the card.
Handwritten placecards feel warm and personal, even if your handwriting is not perfectly swirly. Print them if you are making a large set, want a consistent look, or are working with a more formal event. A good middle ground is to print the names and add a hand-drawn border, sticker, or little flourish to each card.
Take extra care with names that may be unfamiliar to you. Ask ahead if you are unsure about spelling, accents, preferred names, or nicknames. That small bit of care means more than any glittery decoration.
3. Add one party-specific detail
A placecard becomes memorable when it connects to the reason everyone gathered. Keep it simple: a birthday candle doodle, a tiny heart for an anniversary dinner, a snowflake for a winter party, or a colorful pencil for a classroom celebration.
For a themed party, use a detail rather than covering the whole card in a theme. At a pet-loving birthday, a small paw print is enough. At a gamer party, use a pixel heart or controller icon. At a bridal shower, a floral corner or a delicate bow can add a sweet finishing touch without making the table feel busy.
If you have a mix of adults and kids, make the children’s cards part of the fun. Add a different sticker, simple character, or tiny riddle to each one. It gives younger guests something to enjoy while everyone gets settled.
4. Use placecards to make seating easier
Placecards are helpful even when your party is not formal. They can keep couples, families, and friend groups comfortable while preventing the familiar moment when everyone pauses at the table and waits for someone else to choose first.
For dinner parties, alternate personalities when you can. Put chatty guests near quieter guests who enjoy conversation, rather than creating one loud end and one silent end of the table. At family gatherings, avoid placing people together if you already know the conversation may get a little too spicy before dessert.
At a kids’ table, group children who know each other while leaving enough space for easy supervision. For a buffet or open-house party, use placecards for food labels, favor bags, or drink markers instead of assigned seating. The same little cards can still make the event feel organized and welcoming.
5. Set them out at the last minute
Placecards should go on the table after the main decorating is finished. This lets you see whether a name is hidden behind a centerpiece, too close to a water glass, or facing the wrong direction. Place each folded card just above the plate or slightly to the left of the napkin.
If your table is outdoors, weigh down flat cards with a small cookie, favor, or wrapped utensil bundle. Folded cards hold up better in a breeze, but avoid lightweight paper that may topple over halfway through the party.
Easy Design Ideas for Every Kind of Host
You do not need to reinvent the placecard for every event. A few adaptable ideas can carry you through birthdays, dinners, showers, and holiday celebrations.
For a colorful birthday table, use a different bright card color for each guest and write names in a contrasting marker. For a cozy fall dinner, try kraft cardstock, cream ink, and a small leaf sticker. For a tea party or spring brunch, use pale pink, lavender, or butter-yellow cards with a tiny floral detail in one corner.
Want a more personal touch? Add a short word under each name, such as “Cake Captain,” “Dance Floor Legend,” “Best Aunt,” or “Snack Expert.” Keep it kind and easy to understand. The goal is a smile, not an inside joke that leaves anyone confused.
You can also turn placecards into take-home keepsakes. Add a short thank-you note inside a folded card, attach one to a party favor, or use a small photo clip to hold each name. This works especially well for baby showers, milestone birthdays, and holiday dinners where guests may appreciate a little extra warmth.
Common Placecard Mistakes to Skip
Overdecorating is the most common trap. When the table already has patterned plates, flowers, and colorful food, a simple card often looks better than one covered in layers of ribbon, stickers, and glitter. Choose one focal detail and let the guest’s name remain the star.
Another easy mistake is waiting until guests arrive to write names. Even a small party can feel rushed when you are trying to remember spellings while the doorbell rings. Make the cards a day or two ahead, then keep a few blanks and a pen nearby for last-minute additions.
Finally, do not assume placecards must assign permanent seats. They can simply welcome guests, label a dessert station, mark mocktail glasses, or help everyone find their party favor. Use them in the way that makes your gathering easier and more joyful.
A stack of blank cards, a favorite pen, and a little imagination are enough to make a table feel like it was waiting for the people around it. Whether you go polished, punny, floral, or full-on birthday-bright, make each name easy to spot and genuinely nice to receive. That is crafting smiles in one small fold of paper.
