

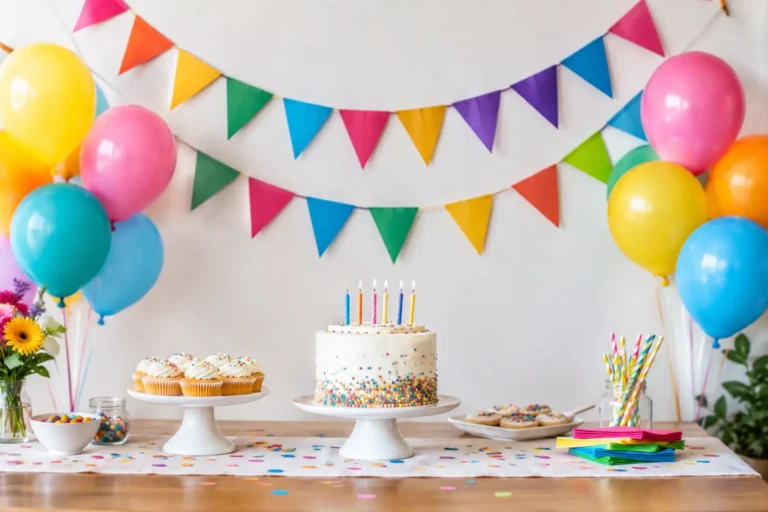
The cake gets the candles, but the backdrop gets the photos. That is why party banners do more than fill an empty wall – they set the mood before the first guest arrives. A bright birthday message, a sweet baby shower design, or a bold graduation banner instantly tells everyone, “This moment matters.”
For hosts who want a celebration to feel thoughtful without turning setup into a major craft project, the right banner is one of the easiest places to start. It can be playful, polished, funny, colorful, or all four. The best choice simply matches the person, the occasion, and the space where the happy chaos is about to happen.
Start With the Moment You Are Celebrating
A banner should feel like it belongs at the party, not like an afterthought pulled from a drawer. Start with the occasion, then think about the guest of honor. A first birthday may call for cheerful animals, stars, soft pastels, or a big, happy number one. A teen birthday might feel more right with bright colors, gaming references, trendy phrases, or a design that is a little extra in the best way.
For baby showers and engagement parties, florals, gentle neutrals, and classic lettering create a warm welcome. Graduations can handle stronger color, school spirit, and a clear “Congrats, Grad!” message. For a retirement party, anniversary, or milestone birthday, a banner can lean elegant, witty, or sentimental depending on the crowd.
There is no rule that says every party has to match a Pinterest-perfect theme. Sometimes the most memorable setup comes from one detail that feels unmistakably personal. A dog lover might appreciate paw prints and a funny message. A gamer may prefer a banner that feels like part of the game. A child who is obsessed with dinosaurs, space, or unicorns deserves a celebration that says so loudly.
How to Choose Party Banners That Photograph Well
Photos are often taken in a hurry: someone is holding a plate, the birthday kid is wiggling, and a cousin is trying to get everybody to look in the same direction. A good banner makes those candid pictures feel instantly more festive.
Choose a design with enough contrast to be seen from a few feet away. Dark letters against a pale wall, or light letters against a bold background, usually read better than shades that blend together. If your party is outdoors, remember that direct sunlight can wash out delicate colors. Richer tones, large lettering, and simple graphic elements tend to hold up better in photos.
Size matters, too. A small banner can look charming over a dessert table, but it may disappear above a wide fireplace or behind a large group. Measure the wall, doorway, mantel, or fence before ordering. Then leave room around the banner so it has a chance to stand out. It does not need to compete with every balloon, streamer, and centerpiece in the room.
If you are decorating a compact apartment, classroom, or dining room, one statement banner is often better than several small decorations. It gives the eye a clear focal point and keeps setup feeling fun instead of cluttered.
Pick a Message That Feels Like Them
The message is where a party banner becomes personal. “Happy Birthday” works beautifully for almost any age, especially when the artwork carries the personality. But a playful phrase can make guests smile before they even find the snack table.
For younger kids, keep it easy to read and full of energy. For adults, an inside joke, a favorite saying, or a lightly cheeky phrase can add personality without needing custom printing. Think about what the guest of honor would actually enjoy seeing in the background of every photo.
A short message usually has the most impact. Long phrases can be hard to read from across the room, and they can make the whole design feel busy. Let the banner do its job, then let the cake, food, gifts, and people bring the rest of the story.
Match the Banner to Your Decorating Style
A banner does not have to dictate the whole party color palette. It can lead the way, or it can tie together colors you already love. If you have chosen rainbow plates and bright balloons, a graphic banner with simple lettering keeps the look lively without adding visual noise. If your table is full of florals and soft pinks, a pretty banner can carry those same tones up onto the wall.
A helpful approach is to choose one main color, one supporting color, and one neutral. For example, a blue birthday banner can pair with yellow balloons and white tableware. A floral banner might look lovely with blush napkins, greenery, and clear cups. You do not need every item to be identical. A little variation makes the setup look collected rather than copied.
When in doubt, let the banner be the hero and keep the rest simple. Balloons in two coordinating colors, a matching tablecloth, and a cake topper are often plenty. This is especially helpful for busy parents, teachers, and hosts who want a big party feeling without buying a cartload of decorations.
Where to Hang a Party Banner
The best spot is wherever people naturally gather. Above the food table is a classic choice because guests will see it all party long. Behind the cake creates a ready-made photo backdrop. Over the front door offers a cheerful welcome, while a backyard fence gives an outdoor event an instant sense of occasion.
Before hanging anything, check the surface. Smooth indoor walls may work well with removable adhesive strips, while a mantel, curtain rod, or fence may be easier to decorate with string or clips. If you are hosting at a rented venue, classroom, or office, choose attachment methods that are easy to remove and unlikely to leave marks.
For outdoor parties, plan for wind. Secure the ends firmly, and avoid placing lightweight paper decorations where they will flap into food or drinks. If the forecast looks unpredictable, set up a backup spot inside or under a covered patio. A little flexibility saves a lot of last-minute scrambling.
Make Setup Easy, Not Fussy
The best party plans leave room for enjoying the party. Gather your banner, hanging supplies, scissors, and any matching decorations in one place the night before. If you are adding balloons, inflate them close to party time so they look their best. Hang the banner first, then build everything else around it.
For a quick but polished setup, focus on four details:
- Place the banner at eye level or slightly higher for group photos.
- Keep the message centered over the table, cake, or main activity area.
- Use coordinated colors in a few nearby decorations instead of everywhere.
- Step back and take a phone photo before guests arrive to see what needs adjusting.
That last step is surprisingly useful. A photo reveals crooked lettering, a gap in the backdrop, or a balloon cluster that needs moving far faster than staring at it in person.
Save It, Reuse It, Celebrate Again
Not every party decoration needs to be single-use. A classic “Happy Birthday” banner can come out year after year for family celebrations, classroom parties, and office cake breaks. Store it flat when possible, away from moisture and direct sunlight. If it folds, tuck it into a large envelope, folder, or storage bin so the edges stay neat.
Occasion-specific designs can still have a second life. A graduation banner can be part of a photo display or scrapbook page. A baby shower banner can be saved with keepsakes for the new arrival. And if you are planning a party for someone else, passing a banner along with a little note is a sweet way to keep the celebration going.
At Gooji Paperie, we love the small details that help ordinary rooms turn into memory-making spaces. Whether you are planning a big backyard birthday or a cupcake break for a favorite coworker, choose a banner that makes you smile when you hang it. That feeling tends to spread to everyone who walks through the door.
